

How To Select 1 Color In Photoshop
Photoshop is packed with tools that permit you select all of the same color. While some of them are obvious choices to become the job done, others are nevertheless just as good (or even better) for selecting colors, but were originally designed for other purposes.
In this tutorial, we will show y'all several ways to select the same color in Photoshop.
Why Select the Same Color in Photoshop?

This is an important question to enquire yourself earlier yous employ Photoshop to select a colour. Subsequently all, how you decide to select the same color volition determine how your image will appear at the finish of the edit.
Additionally, your choice of color selection tools may require more work in Photoshop depending on your intended purpose. For example, if you're selecting the same color in Photoshop to only change it to another color, and so you may choose specific tools for the job.
On the other hand, if you're merely selecting the same color in Photoshop to remove it entirely from your image, at that place are faster and more effective tools to practise this.
Getting Started
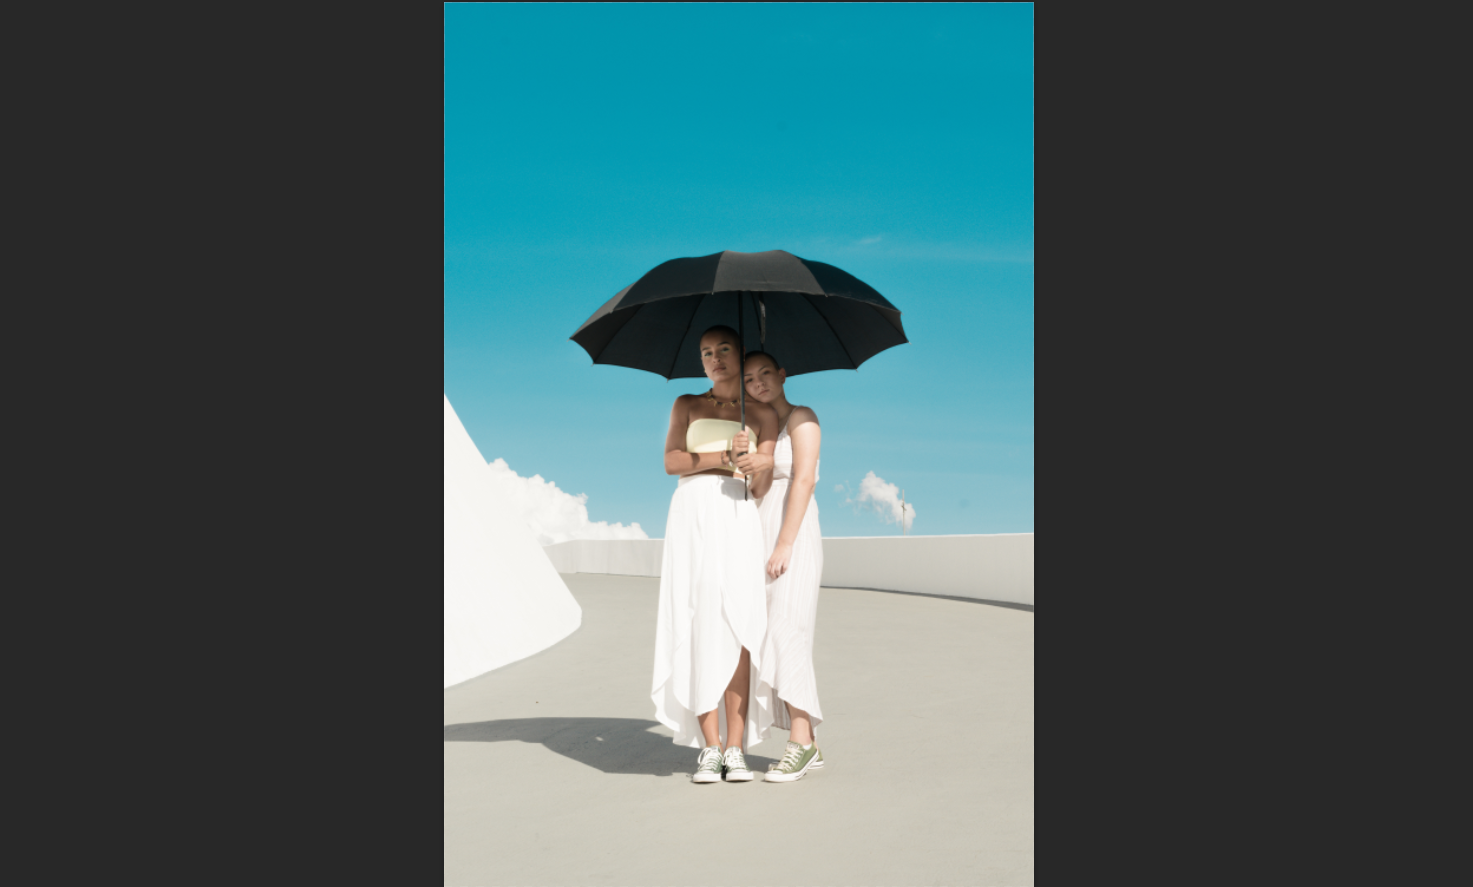
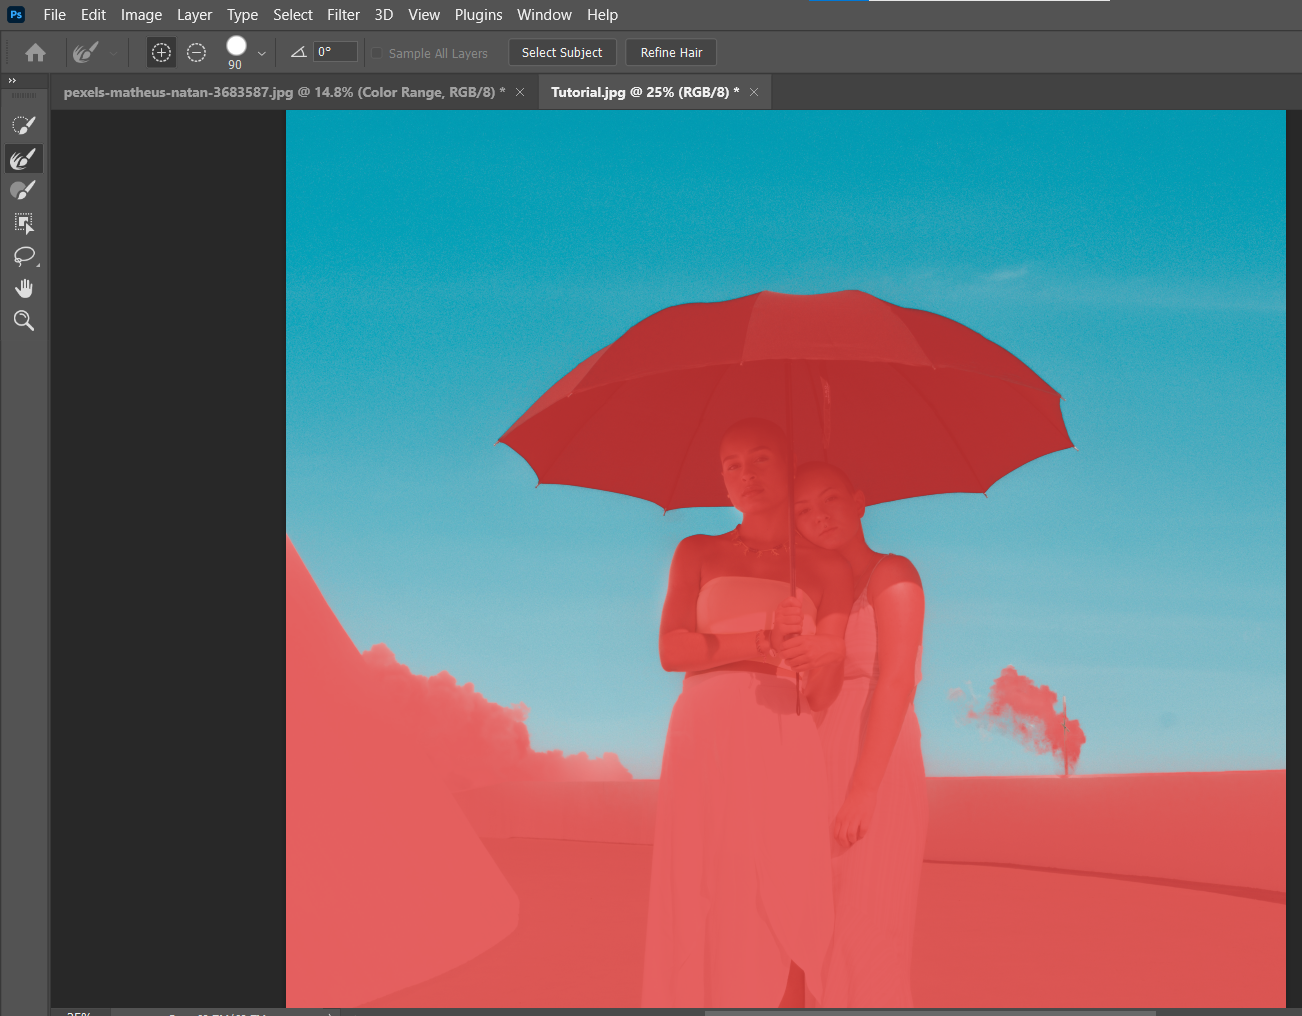
Nosotros're using the in a higher place image for all of our examples because in that location's one main color nosotros're looking to remove from it: cyan.
To brand matters slightly more complicated, there's also bluish in the mix, or at least some kind of gradient or silhouette event that results in blueish in places. But the approaches we'll take will be exactly the same for selecting a unmarried solid color.
You can download this image from Pexels to follow along.
Let's go started!
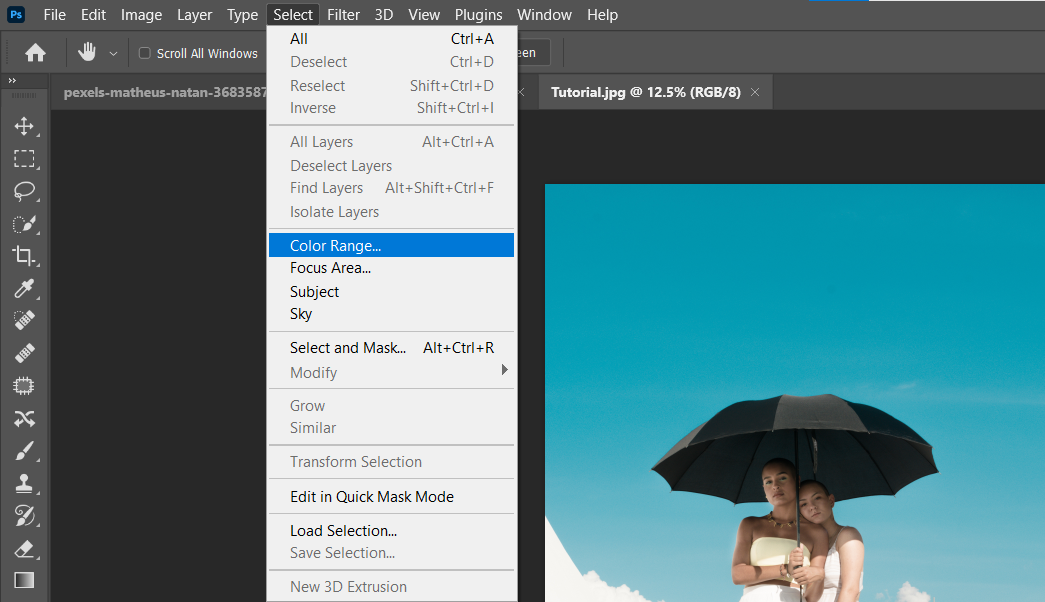
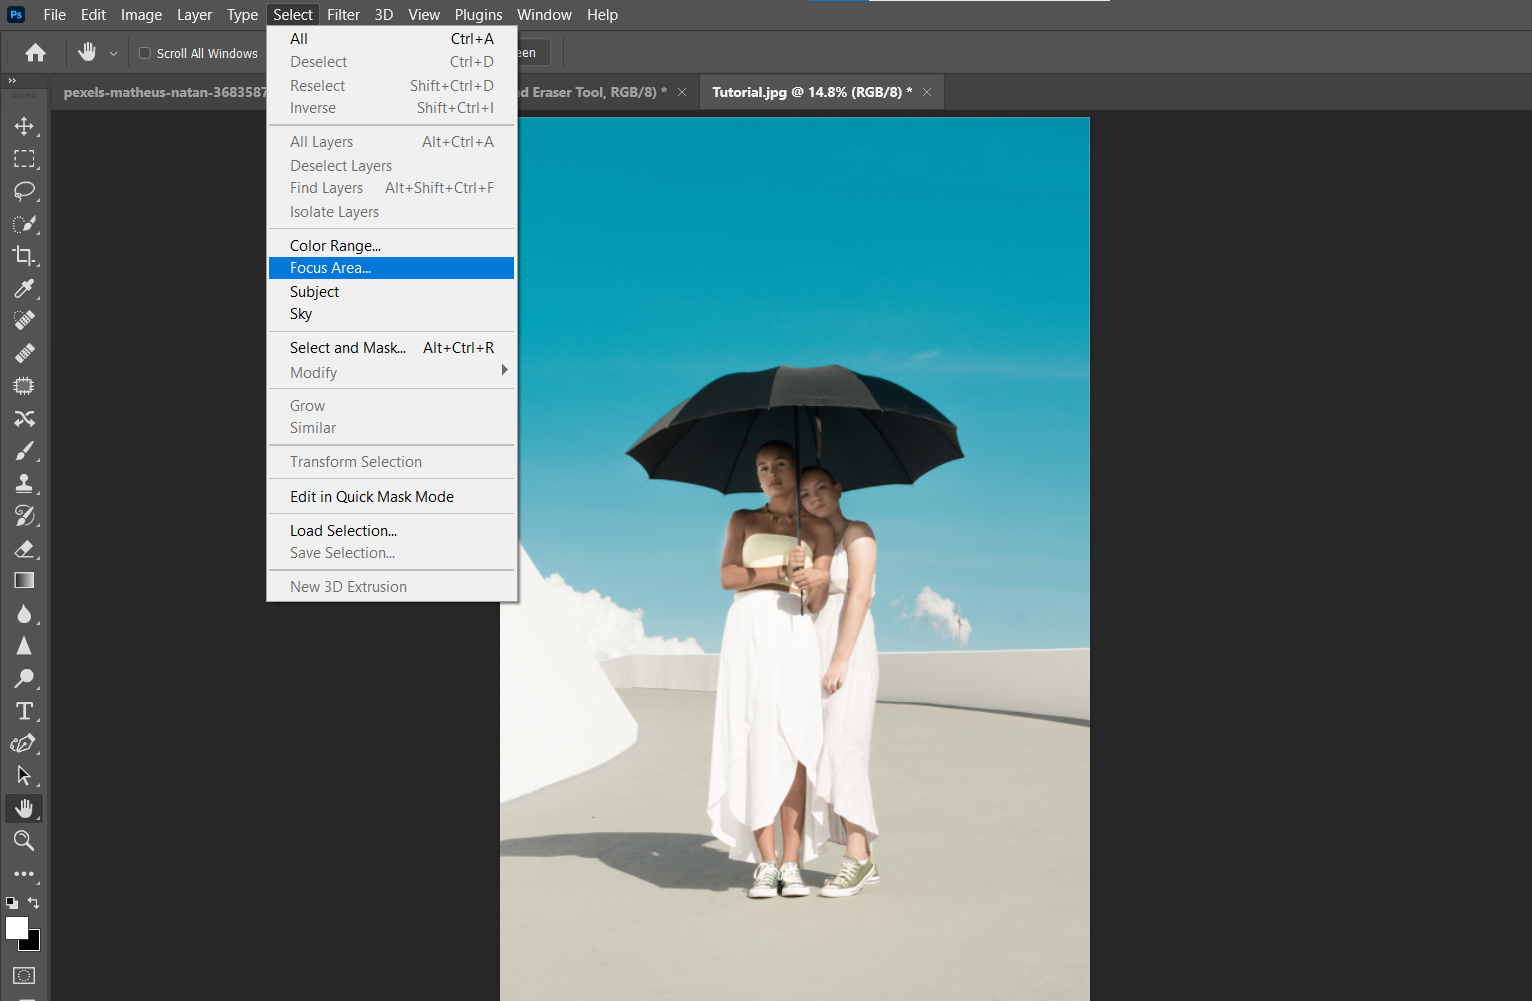
We'll begin with the most obvious option. The Color Range tool in Photoshop is 1 of several choice tools in the Select menu. We will use it to but remove all the cyan and blue from the background.
- In one case the image is loaded into Photoshop, go to Select > Color Range.
- In the Color Range menu, make sure it says Sampled Colors in the dropdown card. Gear up the Fuzziness slider to 0, and gear upRange to 100 percentage. Click to select the Invert option, and set up the Selection Preview to None.
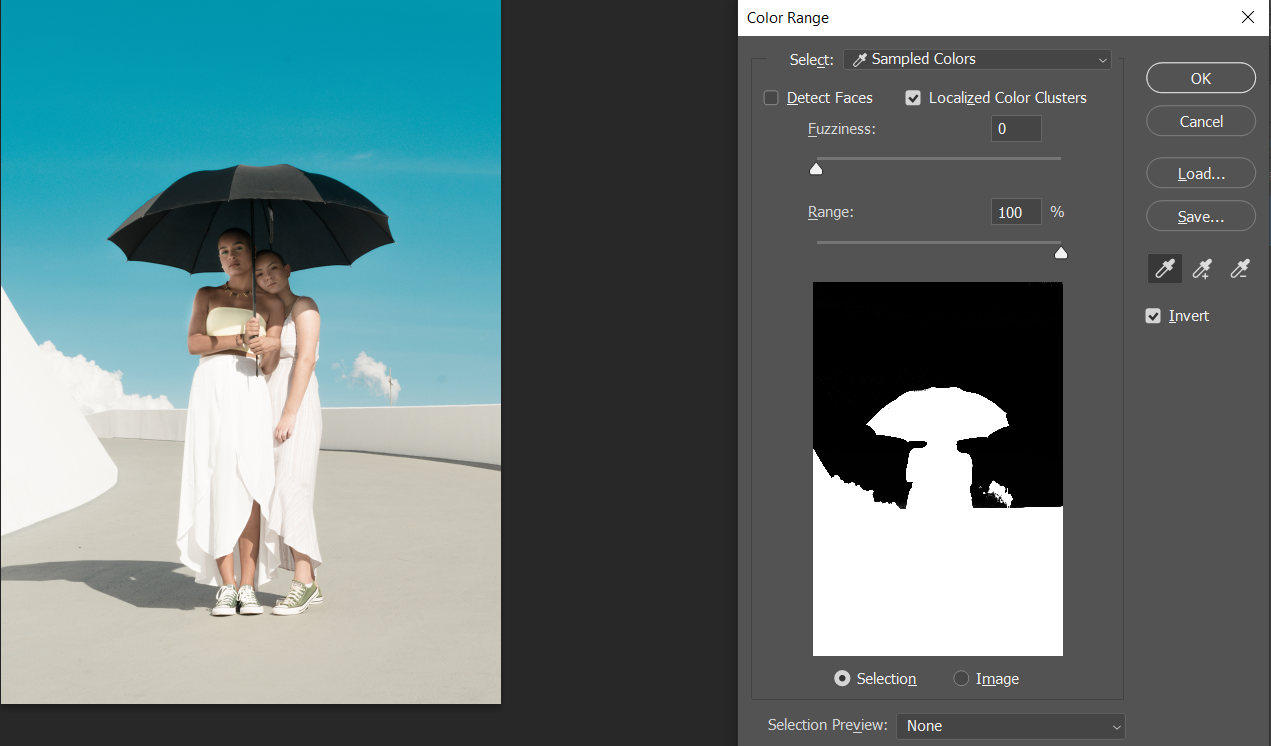
- Click on the +Eyedropper icon, which represents the Add to Sample tool. While left-clicking your mouse, trace around all the cyan in the image. You can also simply click in areas that you've missed. Everything colored Black is your choice.

- Next, let's clean upwards whatever black specks from everything that is not cyan or blue in the image. To do this, select the -Eyedropper icon, which is Subtract from Sample tool.
- As earlier, left-click and hold while tracing your mouse wherever y'all encounter black that isn't office of the sky. Besides, be sure to click within the umbrella and on our subjects. Yous want this option to be all White, as shown. Then, click OK.

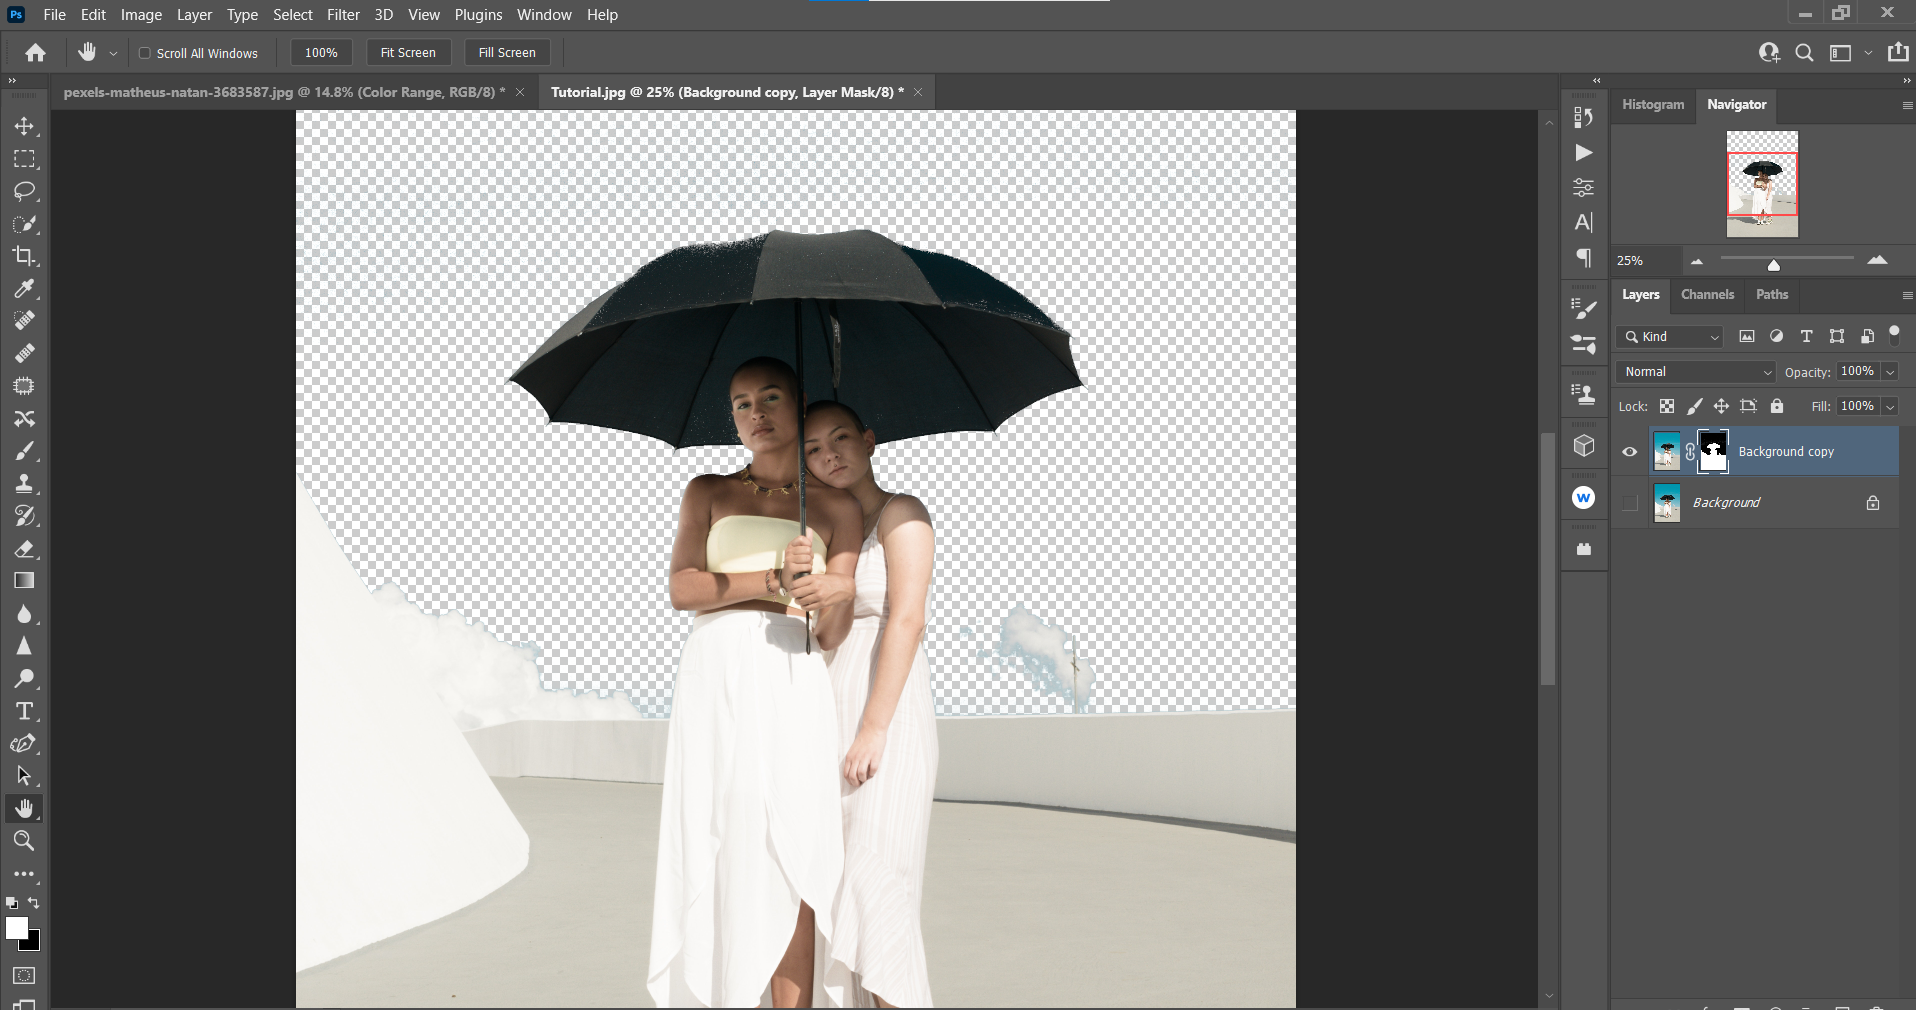
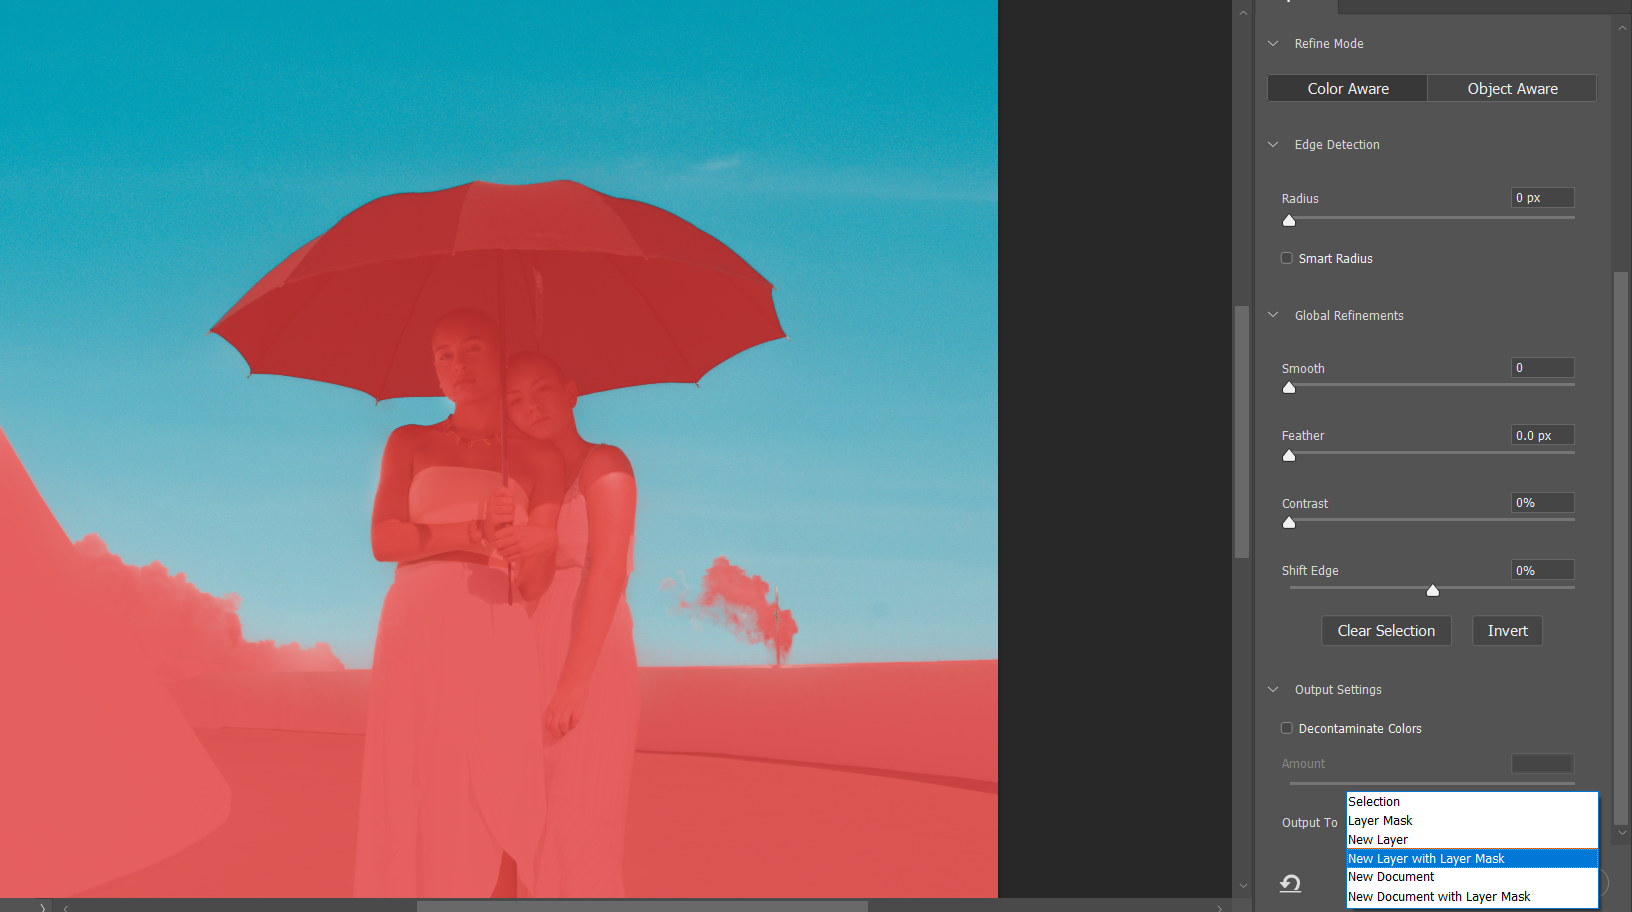
- Your selection will now be highlighted. Next, go to Select > Select and Mask.
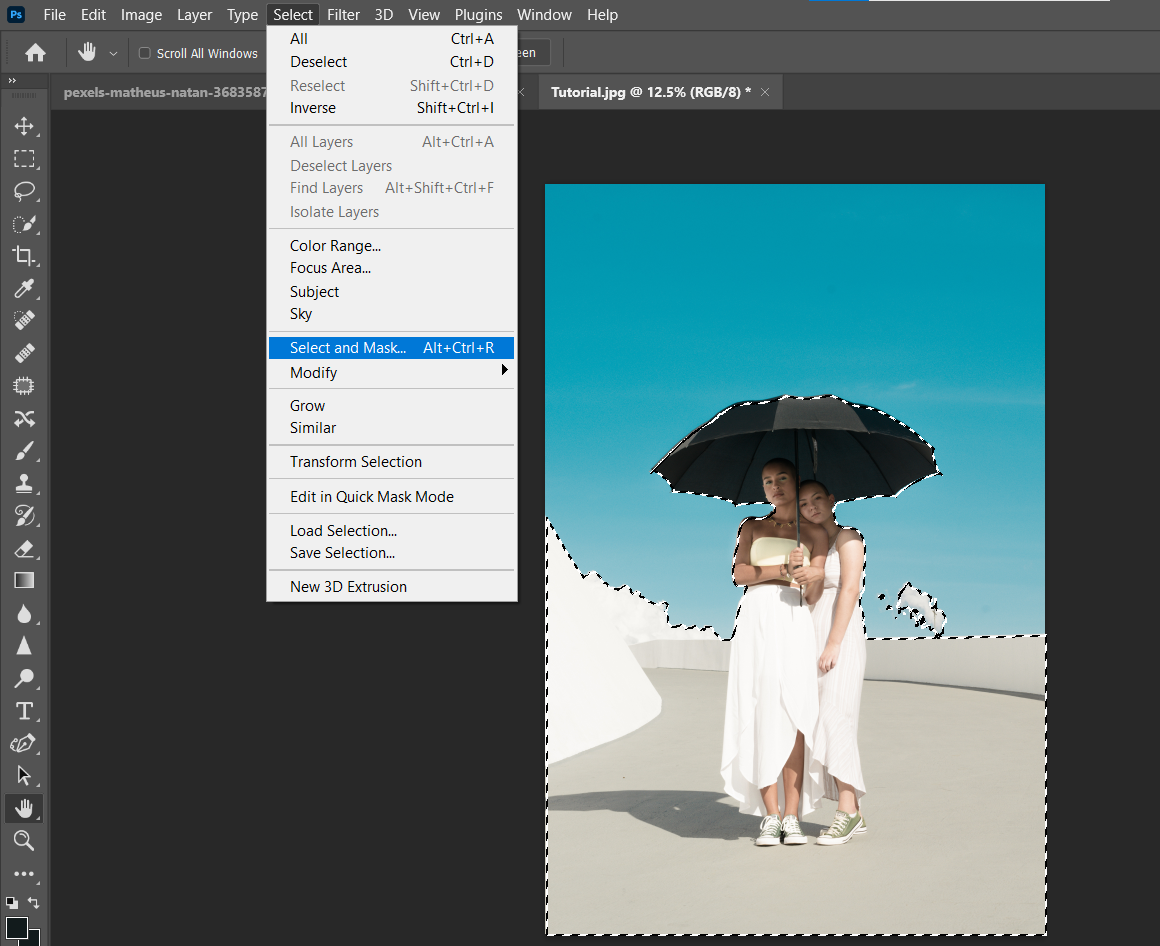
- At the bottom of the Properties menu, change Output To to New Layer with Mask. And so, click OK.

The cyan and blue colors accept been fully removed from the image.
You can too use the Fuzziness and Range sliders in tandem with the sample tools to select the color(s), only for this case, it was more than straightforward to use a more than easily-on approach.
For this particular epitome, removing all the cyan and blueish is very easy when using the Remove Background tool, which is nestled in the Properties bill of fare. You'll need a duplicate layer for this tool to be accessible.
Here's how it works:
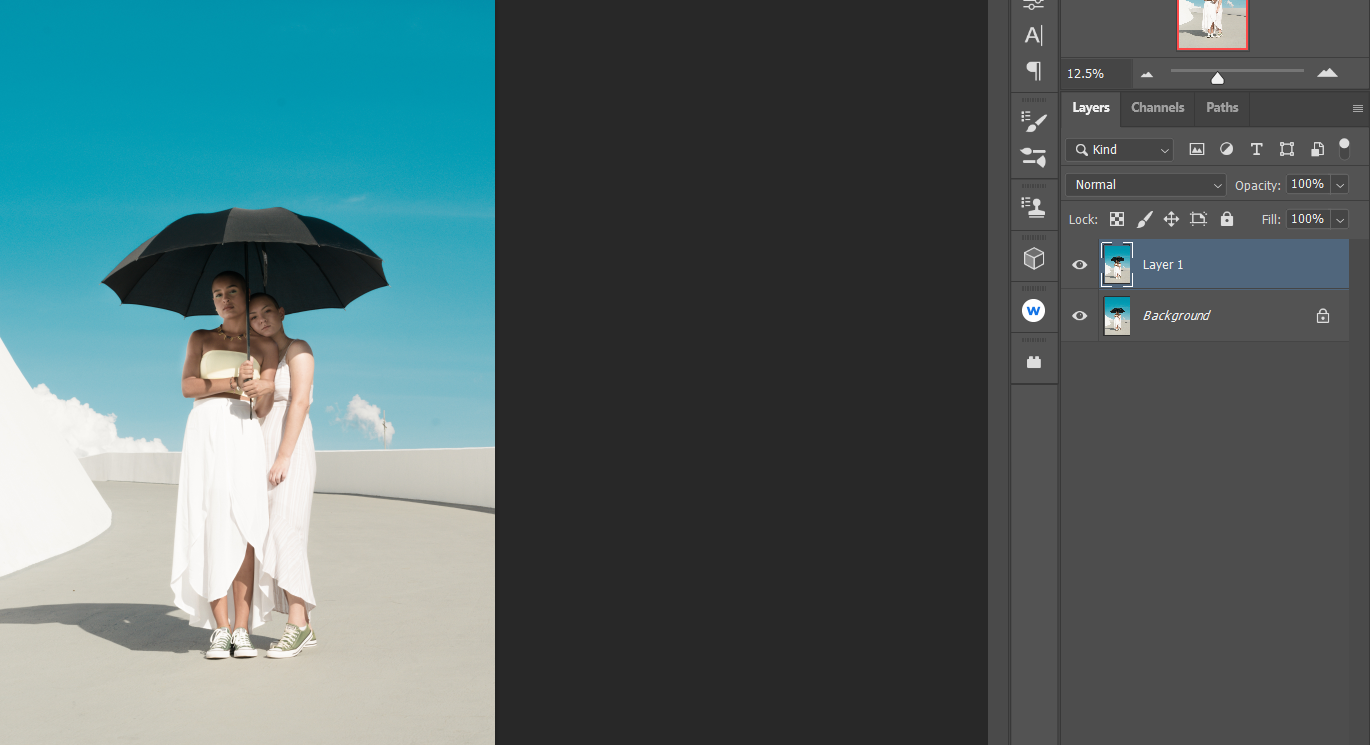
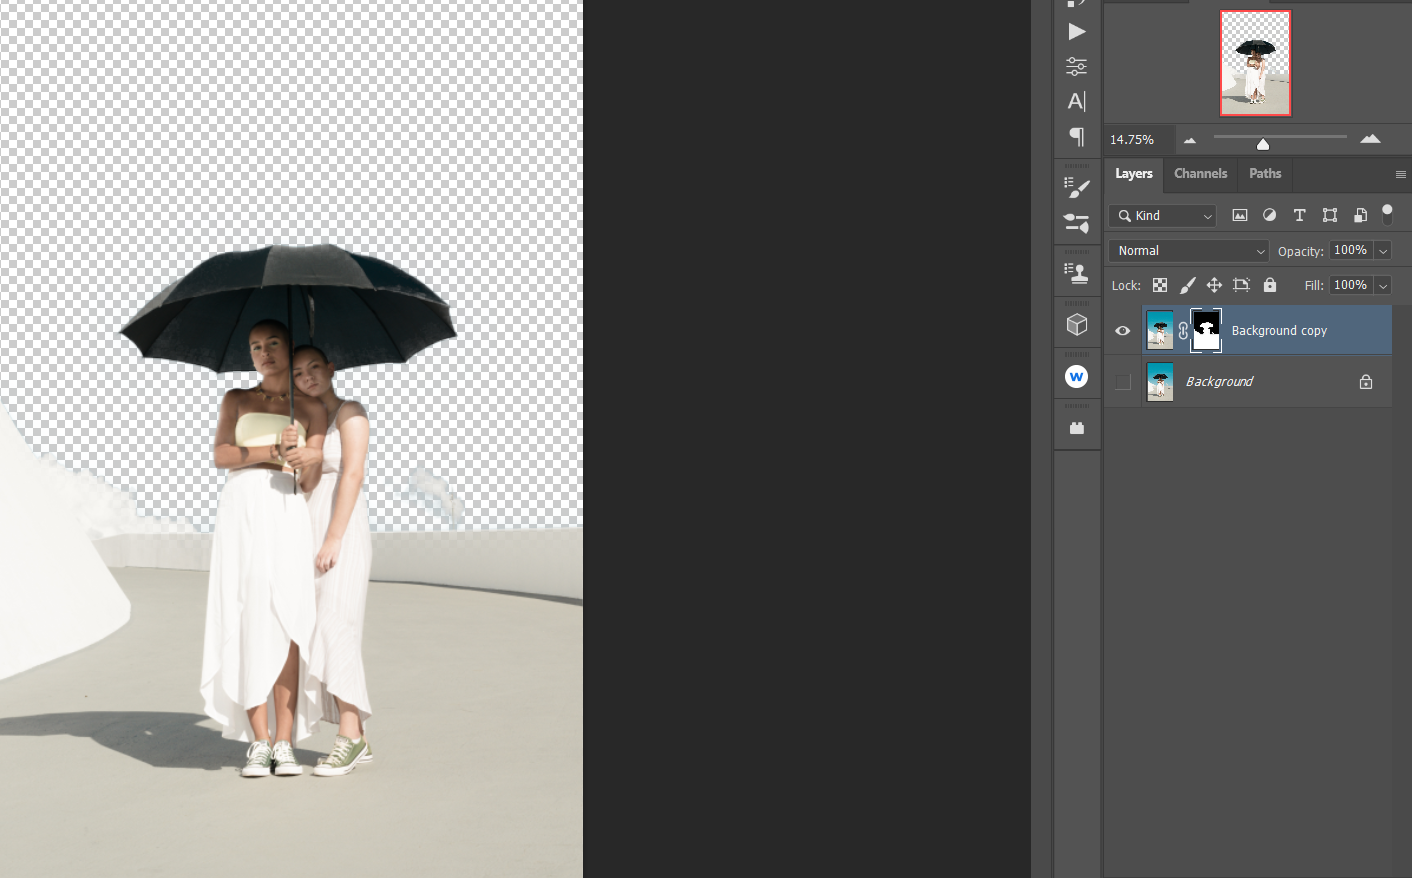
- With your image loaded into Photoshop, printing Ctrl + J to duplicate the layer.
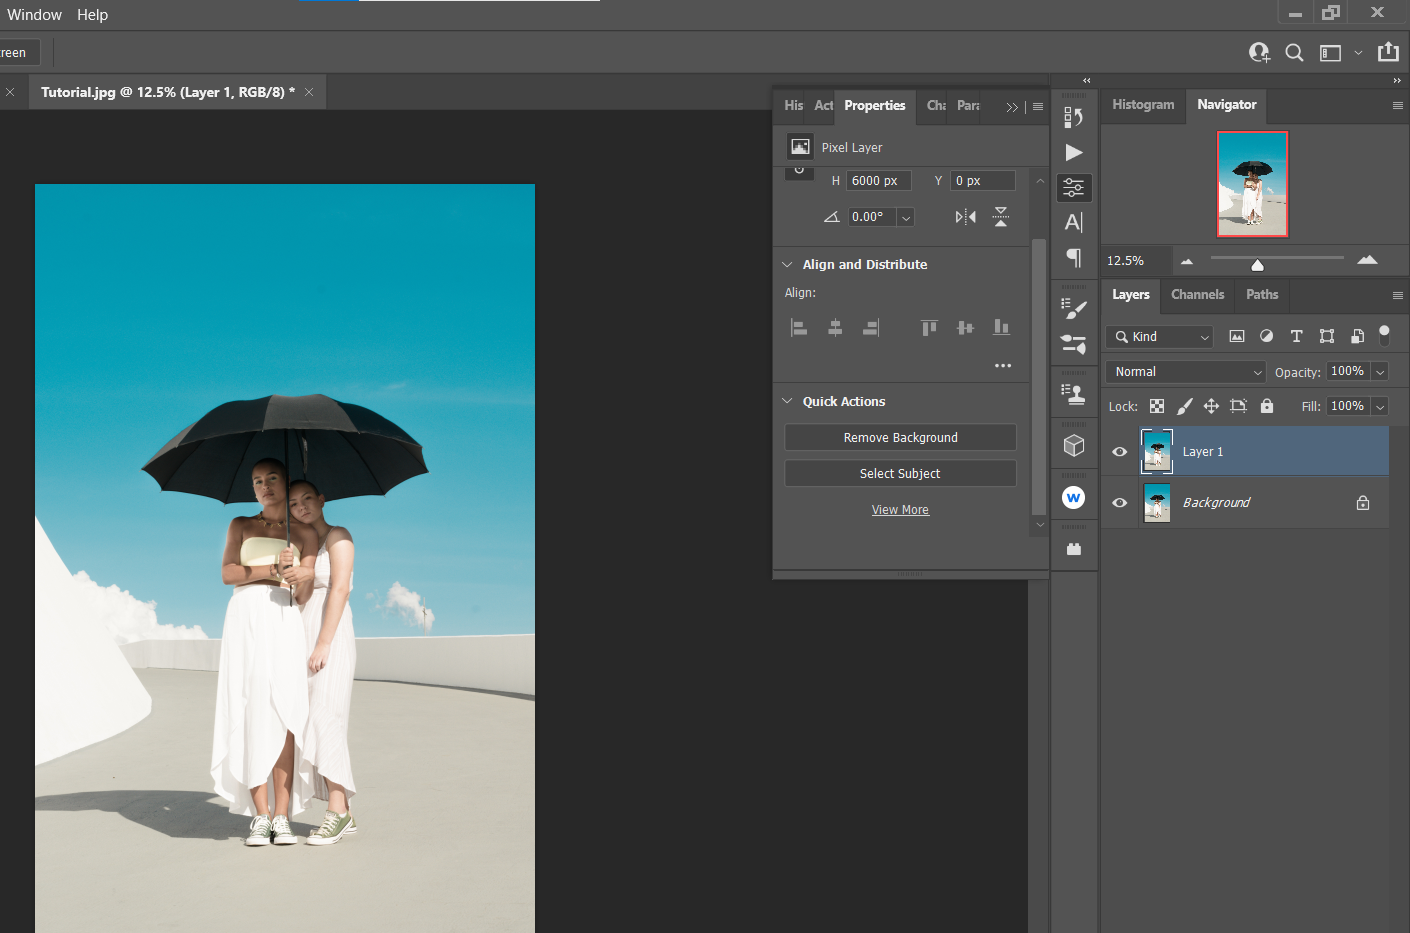
- Go to Window > Backdrop.
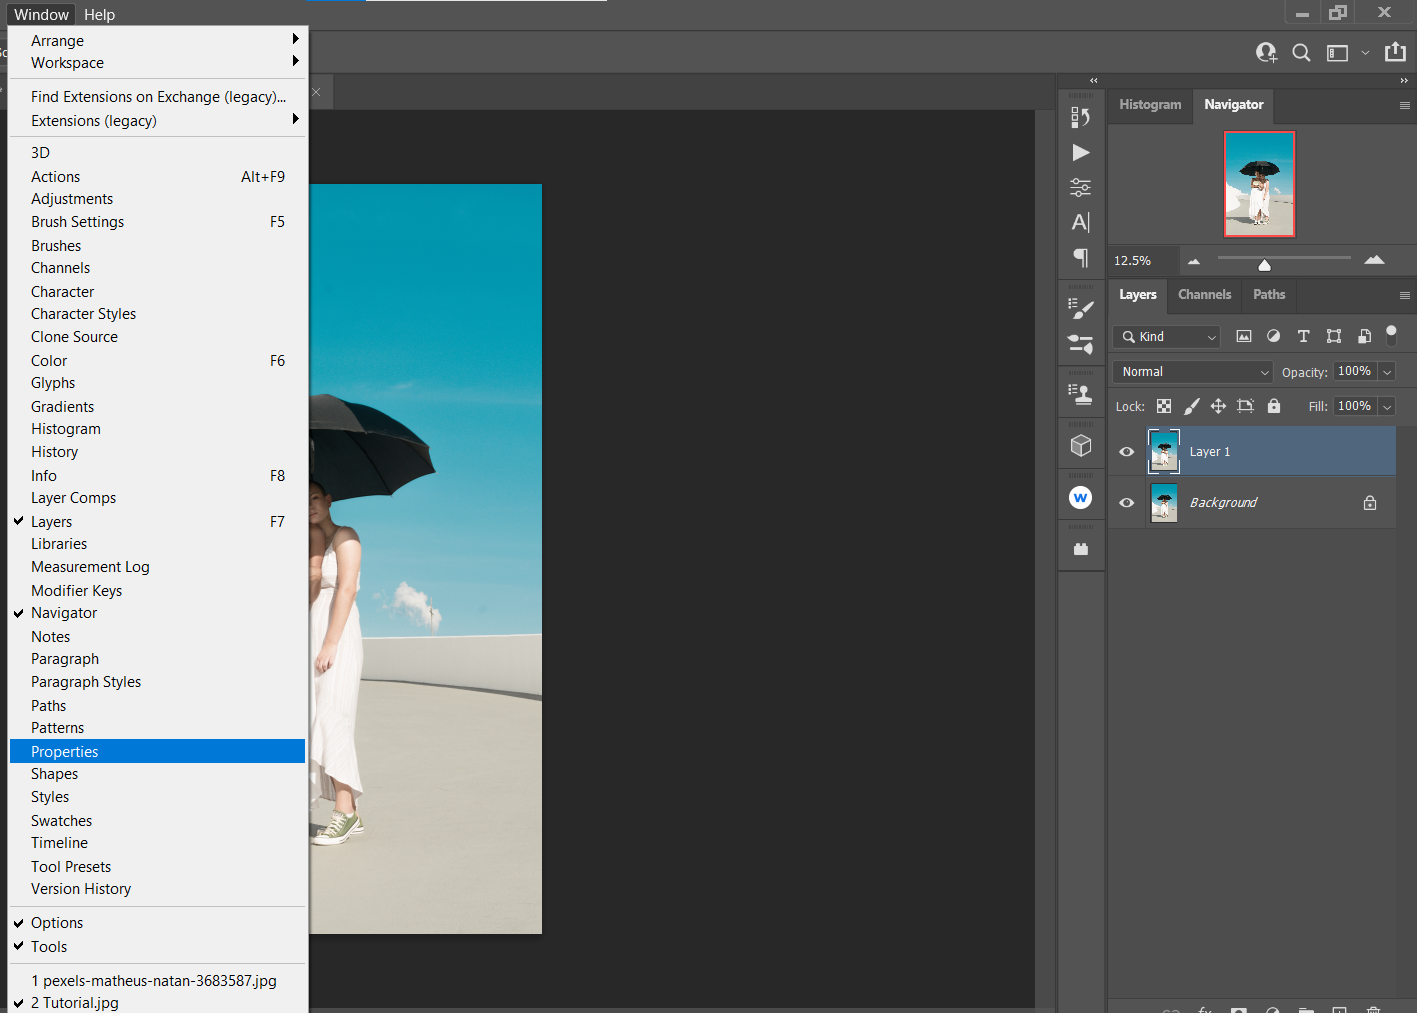
- Under Quick Deportment, click Remove Background.
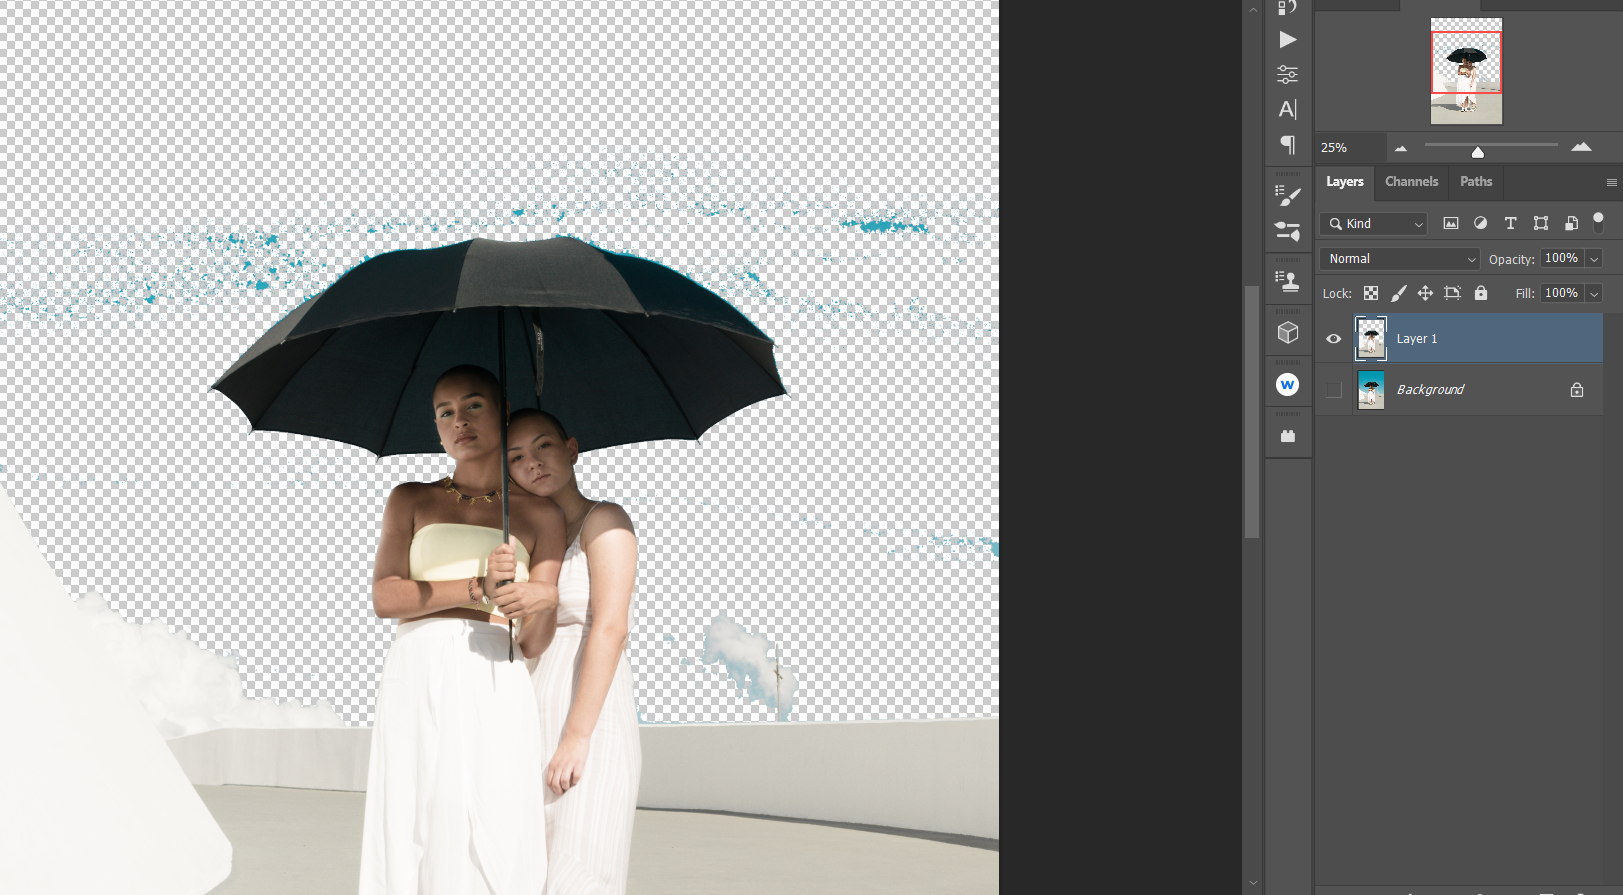
- Deselect the Background layer (bottom layer) by clicking the Centre icon and so that just the selection is revealed.
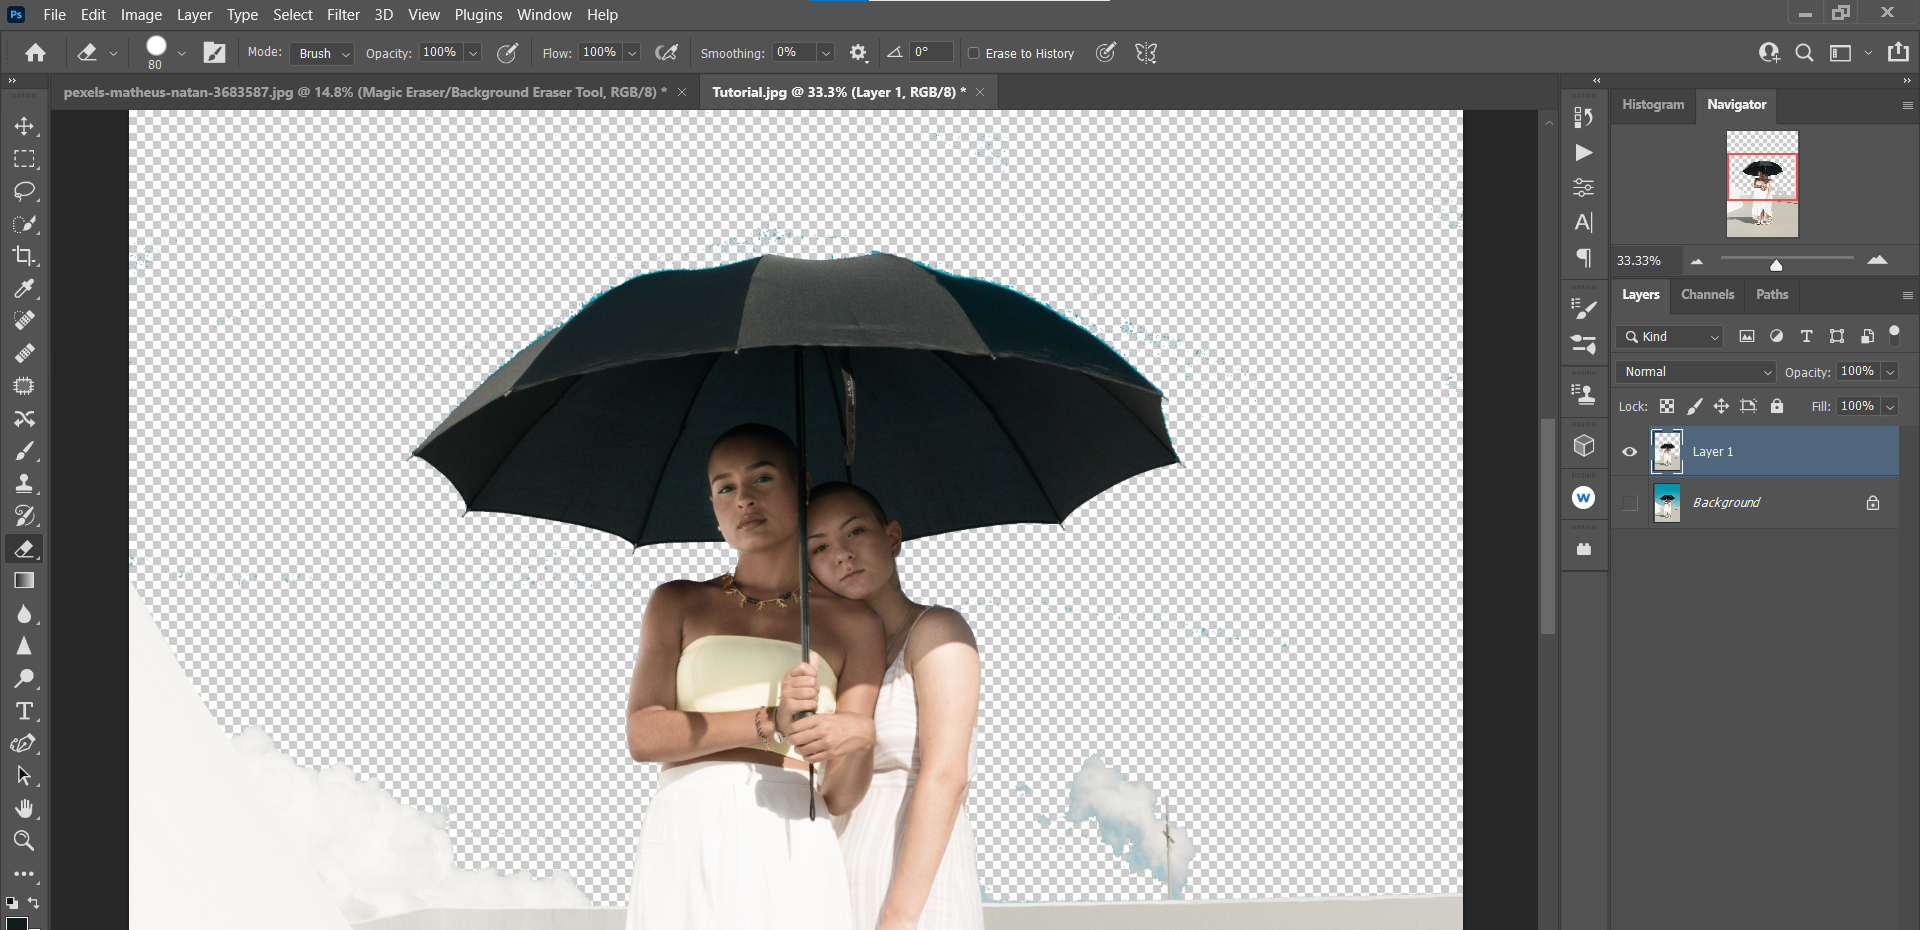
- Toggle the X cardinal until white is the foreground color. Then, printing B for the Castor tool.

- With the layer mask selected on the duplicate layer (top layer), paint White over everything except for the sky. Make sure Opacity and Flow are at 100 percent and a Round Brush is selected.
When painting with the Brush tool, keep these tips in heed:
- The Brush options are located in the top bill of fare bar in Photoshop.
- Use the [] bracket keys to make the brush larger or smaller for better control.
- If y'all paint on the heaven, toggle the X fundamental so the foreground is Black, and merely erase the sky.
- Apply Ctrl + + and Ctrl + - to zoom in and out.
What we terminate upwards with should exist the verbal same outcome as the previous method, with both the sky'due south cyan and blue hues completely removed.
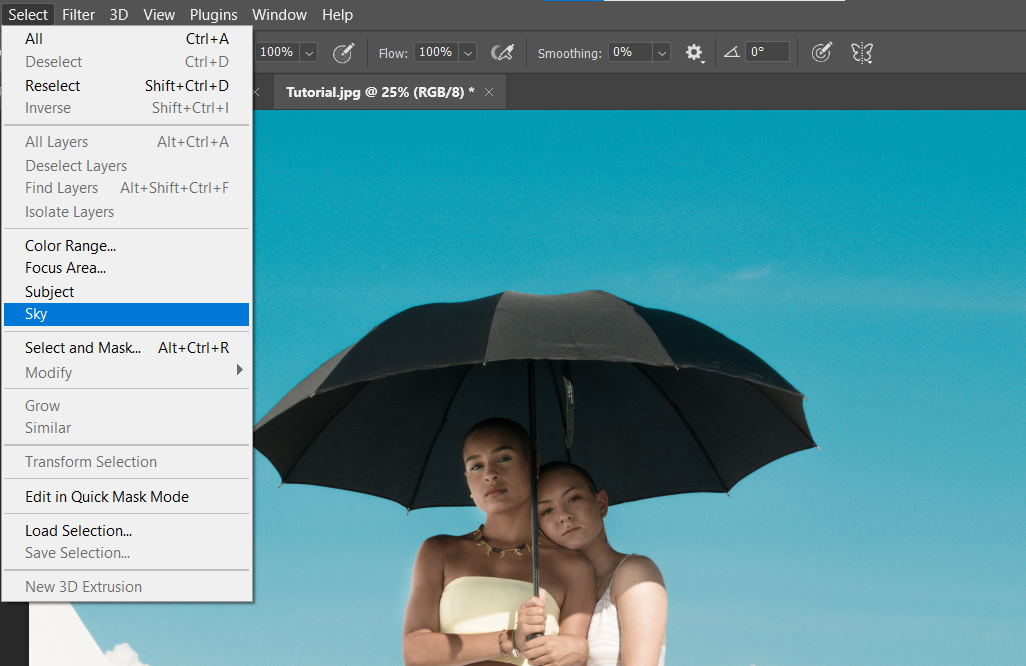
I of the quickest methods for selecting all of the aforementioned color in Photoshop, at least for an image with a bluish sky, is the Sky Select tool.
Here's how information technology works.
- With your prototype loaded into Photoshop, go to Select > Heaven.
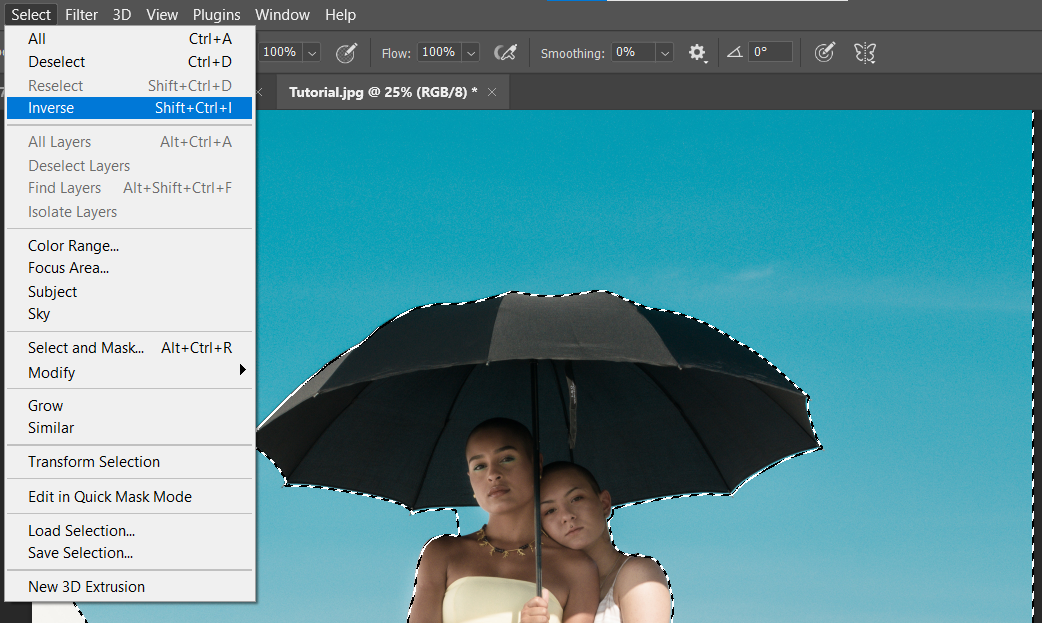
- Since we desire to save everything but the sky, go to Select > Inverse.
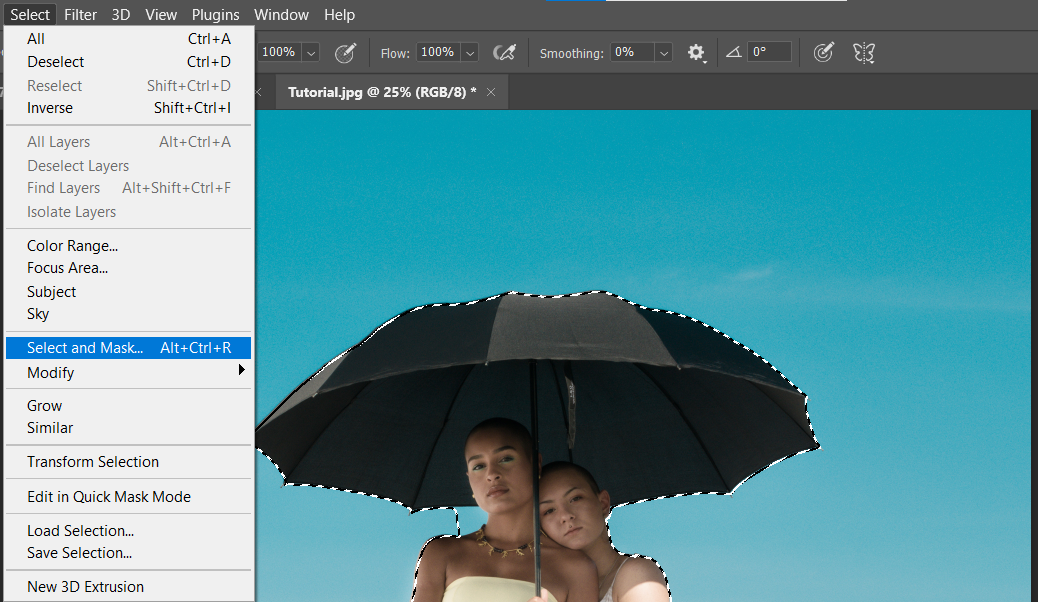
- Go to Select > Select and Mask.
- Choose the middle brush, the Refine Edge tool, and pigment ruby-red over the area next to the subject field'due south neck (on the left side). Too, paint red over the cloud to select it.
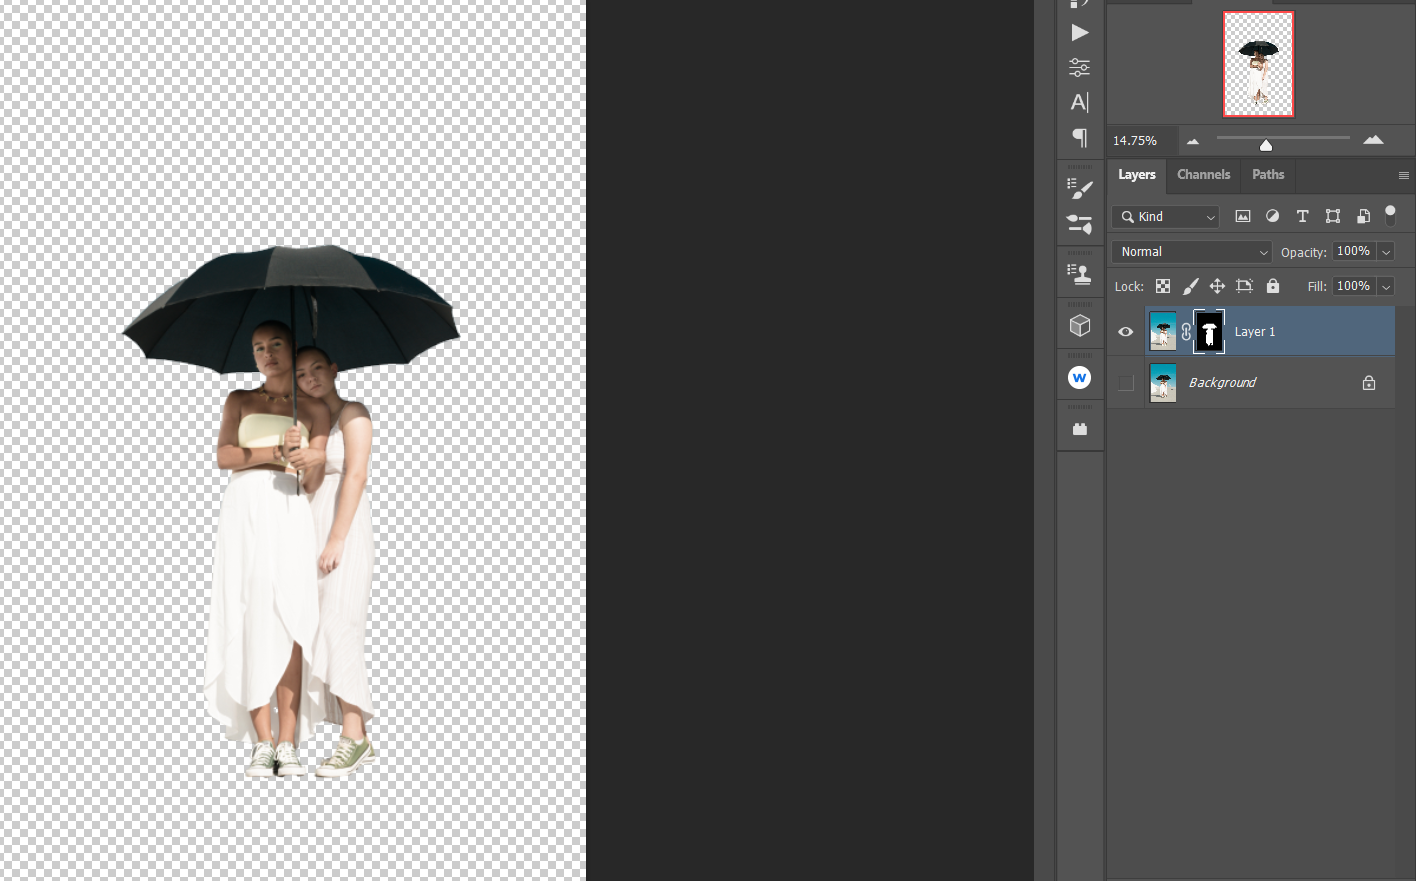
- Change the Output To to New Layer with Layer Mask and click OK.
The end result is two layers with the sky completely removed. If there are touchups needed, you can click on the layer mask and paint in black or white to make full in the details.
In addition to the Sky Select tool, there is as well a heaven replacement tool in Photoshop that lets you bandy your existing sky for another ane.
Technically, this method isn't making a selection as much equally it is just erasing the cyan and bluish. You may express joy at how ridiculously simple and effective this tool is compared to the other methods so far.
Continue in mind that this is a subversive editing workflow. Therefore, depending on how you lot intend to use the image, you may desire to indistinguishable the layer outset by pressing Ctrl + J to save your original layer.
- With your image loaded into Photoshop, click on the Eraser tool menu or Printing E for the standard Eraser tool. Select the Magic Eraser Tool.
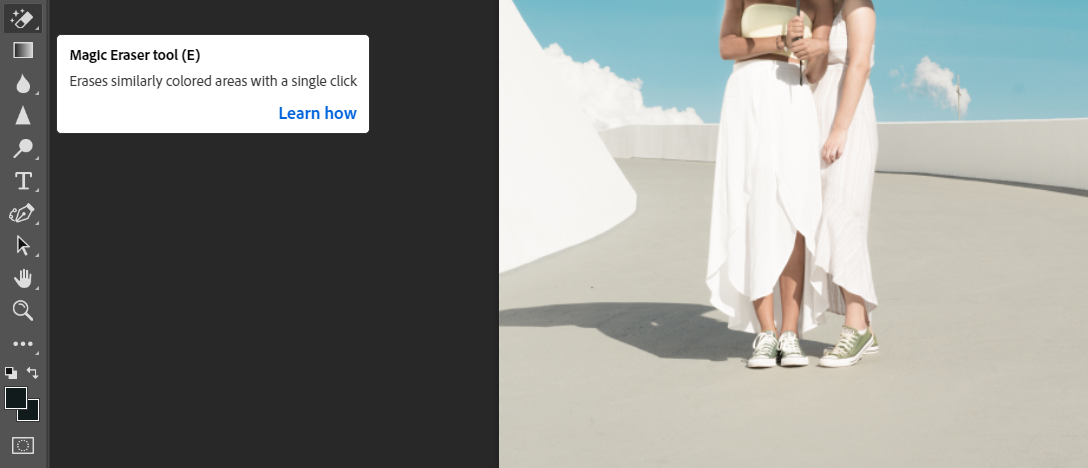
- Click all effectually the heaven regions of the prototype until near of the colour is gone. Don't worry if you can't select all the sky. We will accost that side by side.
- From the Eraser tool bill of fare, select the Eraser tool.
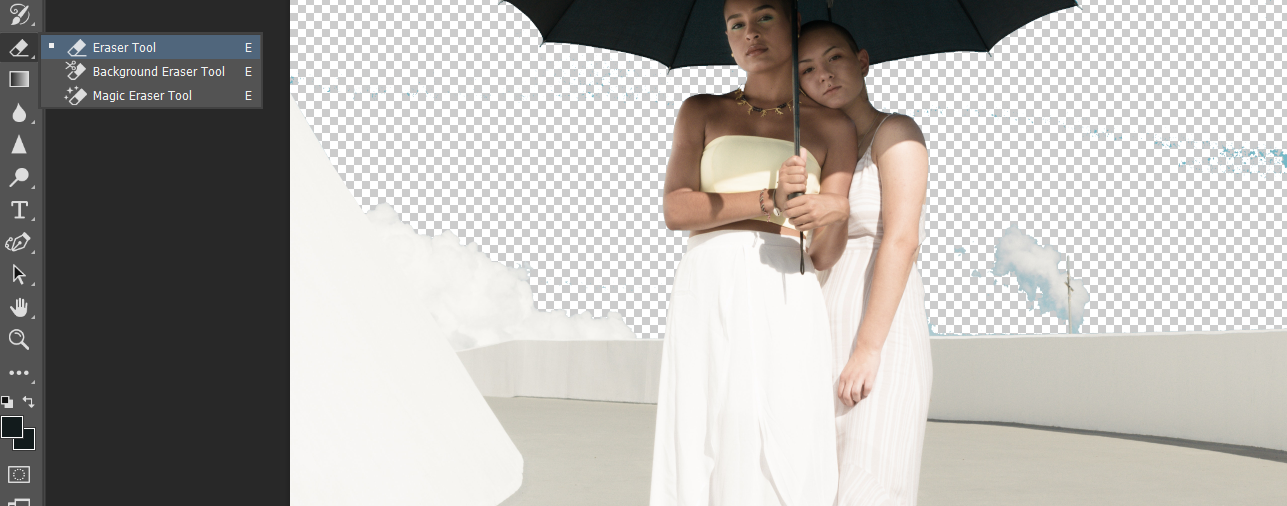
- Simply paint over the rest of the heaven to brand the pick completely transparent.
The resulting image should look exactly similar (or very like) to the rest of the examples nosotros've covered and so far.
Believe it or not, we could keep going on with these tutorials. Simply all of the post-obit tools use similar methods that we've already demonstrated here, primarily making use of layer masks and using the Brush tool to clean upwardly.
Other tools for selecting the same colour in Photoshop include the Vibrance tool, the Focus Surface area tool, and the Bailiwick select tool.
All of these tools will select the same color in Photoshop and just vary by the number of steps they take. However, we've still shown you lot the best ways to get the job done for our example image.
At that place's More than I Way to Do Things in Photoshop

Deciding which tools and methods to utilise when selecting the same color in Photoshop needn't be daunting. Often, it will boil downwardly to what y'all can do in the least amount of time.
The more you lot utilize and experiment with the tools in Photoshop, the more than probable yous'll notice alternative uses for them. You may fifty-fifty discover your ain unique way to select the same color in Photoshop when faced with new challenges.
Most The Writer

Source: https://www.makeuseof.com/tag/select-same-color-photoshop/
Posted by: pettifordwifte1942.blogspot.com
0 Response to "How To Select 1 Color In Photoshop"
Post a Comment